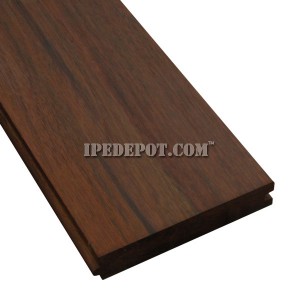
Can you build a deck with tongue and groove boards?

The answer is yes. Creating a deck with tongue and groove lumber is as easy as creating a deck with traditional boards. First, cut all of your pieces into appropriate lengths.
Next, coat any fresh cuts with an end sealer. This will ensure the end cuts don’t release moisture too fast (which reduces the changes of cracking or splitting.
Once your first board is in place, the rest of the job will go smoothly as you just need the other boards to fit snug into one another. If you need help fitting the boards into one another, use a grab clamp or two to help keep the boards in place. For installation, we suggest that you pre-drill a hole on a 45-degree angle where the tongue and the face meet. You will see a slight v-groove in this corner. Then, on that same 45-degree angle, drive a trim head screw through the pre-drilled hole, through the deck board into the floor joist. The trim head screws are required because the head will sink into the corner where the v-groove is. This sinking action will allow the next deck board to slide into place and will perfectly conceal the previously installed screw head.

Some helpful tips to remember when using tongue and groove lumber for decking:
- You must have 24” or more of open air space below the deck to use tongue and groove boards.
- Leave at least 2 sides of the upper deck space open for cross ventilation.
- Tongue and groove decking should be used for covered porches and patios only.
- Do not allow standing water to collect under the deck. Ensure that the ground is adequately sloped under the deck to eliminate standing water under the structure.
- If you install skirting around the perimeter of the deck, it is imperative that the skirting does not prevent cross ventilation.
When choosing your tongue and groove lumber, remember Ipe is a strong, dense material that is great for any outdoor project. Get your free Ipe decking quote directly from the mill. Contact IpeDepot.com today. Happy decking!


